Note: Every effort is made to accurately portray the installation process. However, sometimes the vehicle manufacturer makes changes that affect the steps in door panel removal or installing our product. Use this tutorial as a guide only. If you are not certain of your ability, refer installation to a professional.
Photo 1
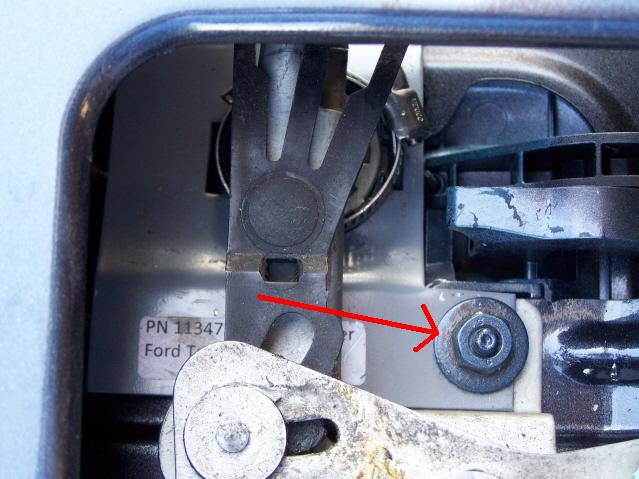
Remove the tailgate handle access panel from the inside surface of the tailgate to expose the backside of the handle and lock mechanisms.
Remove the nut closest to the lock assembly (see red arrow) using a 7/16" socket.
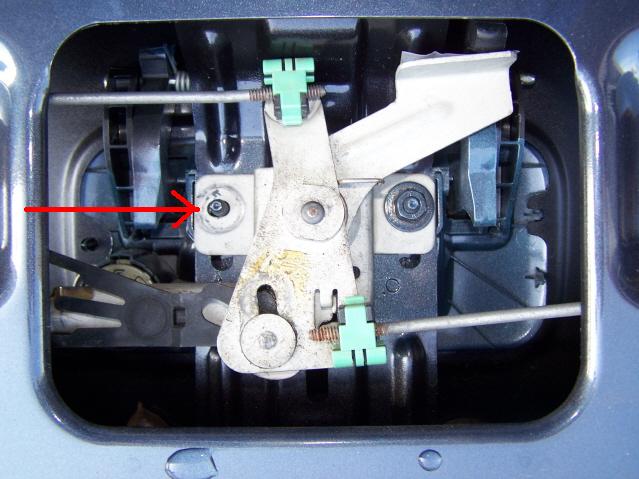
Photo 2
Lift up on the lock pawl and there will be room to slide the plate in and over the lock cylinder. The large hole in the plate will go around the lock cylinder holder plastic. See next photo also.
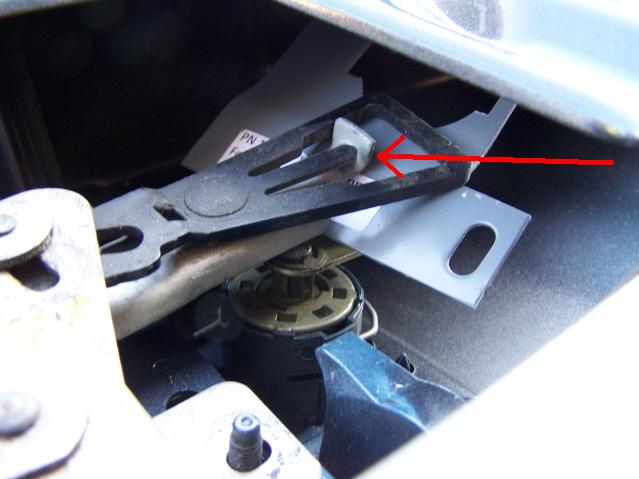
Photo 3
The red arrow shows where to lift up slightly. This will allow the plate to slide in between the lock and pawl assembly.
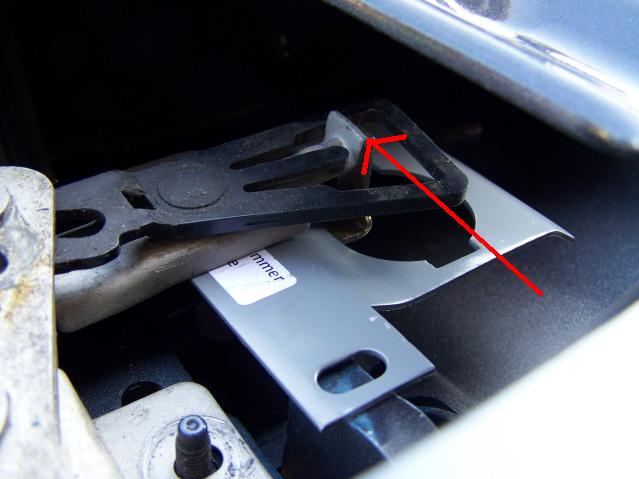
Photo 4
As the plate comes into place, the slot will align with the mounting stud. Place the plate down over the stud. Check that the plate surrounds the lock cylinder. The plate should also rest up against the lock retaining clip that holds the lock cylinder in the plastic holder.
You can place the nut loosely back on the stud.
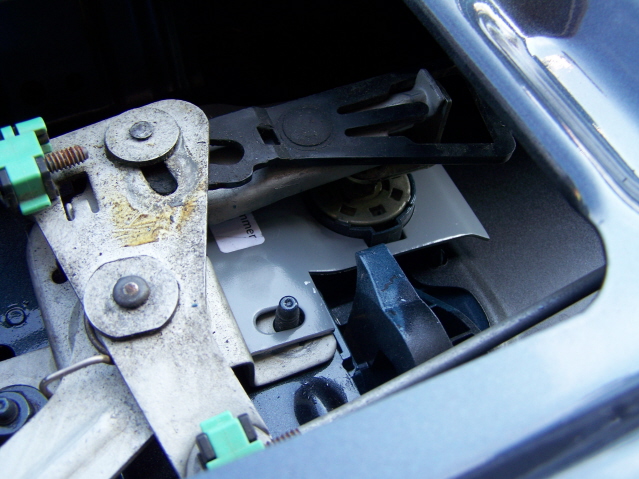
Photo 5
Next, lift up slightly on the lock pawl again and slip the provided hose clamp in and over the lock holder. The clamp should surround the lock holder and seat against the plate. Be sure to position the clamp head so it can be tightened once in place.
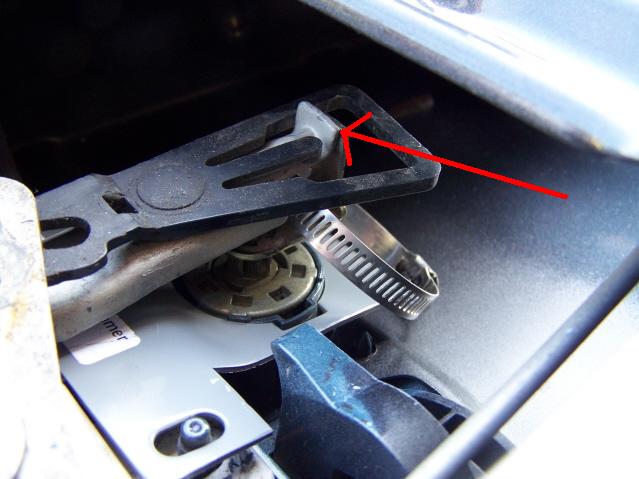
Photo 6
Here the clamp is in place.
Push down on the clamp and plate so the plate is as close as possible to the retaining clip behind it. Once it is pressed down, tighten the clamp. Tighten snugly, but do not over tighten.
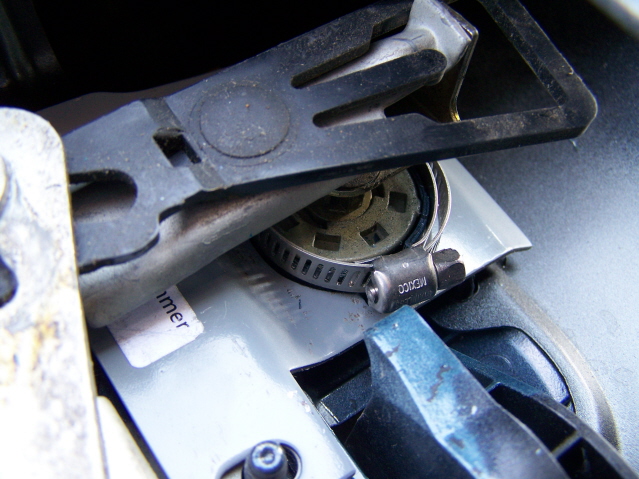
Photo 7
A closer photo of the clamp in place around the lock cylinder holder.
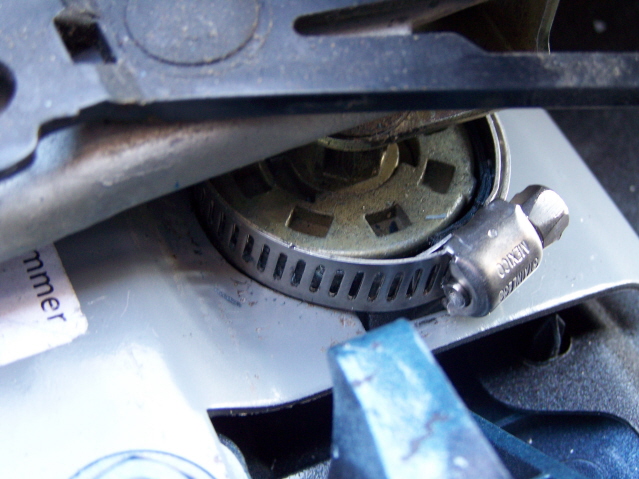
Photo 8
A different angle showing the plate and clamp in place.
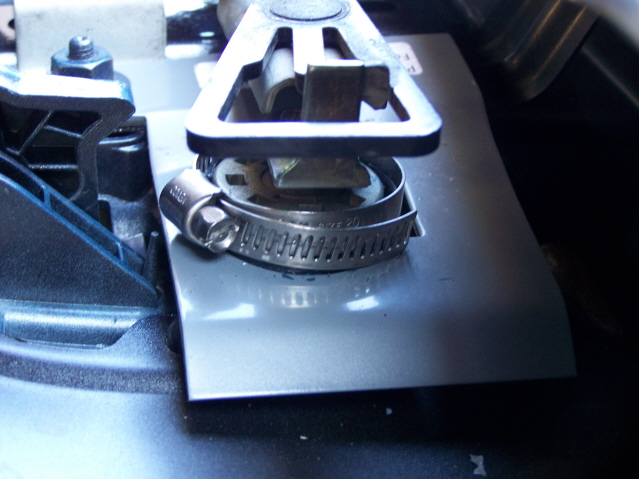
Photo 9
Now tighten the nut snugly.
Use your key and test the operation of the lock.
Confirm proper operation and then close the tailgate and try it again. Make sure there is no interference with any lock or handle components.
Open the gate again and replace the access panel.
All done!
Now, consider adding our Gate Keeper® to keep your tailgate protected when left in the "down" position.
Also, check out our Hood Latch Guard to prevent easy access to your engine compartment.